7.4 Enhanced support for XID printers
For information on enhanced support, see section 2, Printer interaction mode.
MyID supports card personalization and advanced integration with XID printers that are supported by the EDI Secure software. This component is supplied by the vendor. You must install this component on each client workstation on which you intend to use MyID with an XID printer; the printer is otherwise restricted to print only mode.
7.4.1 Configuring XID printers for enhanced support
The EDISecure software installs a Device Configurator application to configure virtual production printers for use with supported printers. Card personalization and advanced integration with MyID is provided only using these virtual production printers.
The following steps are based on use of EDI Secure 1.0.166 and may differ if you are using a different version of the software.
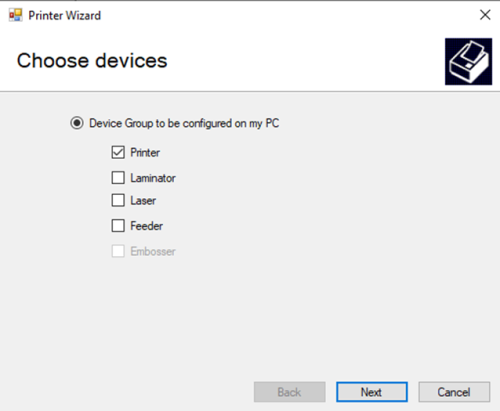
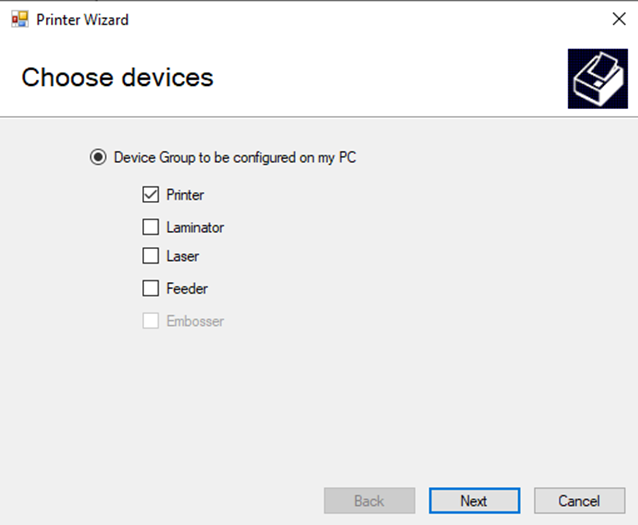
To configure a virtual production printer using a USB connected printer:
-
Start the Administration Center application and right-click New Printer to configure a new virtual production printer.
Note: The menu for configuring a production printer is automatically displayed on starting the administration center when there are no configured groups.
-
Leave the Printer option selected; if the printer is being used with a lamination unit, select the Laminator option. Click Next.
-
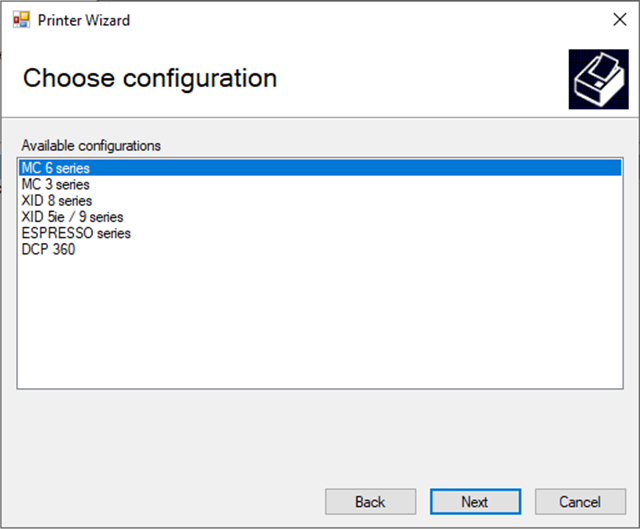
Select the printer configuration according to the type of printer being used. Click Next.

-
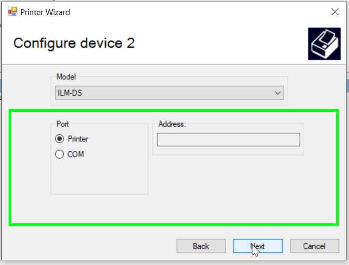
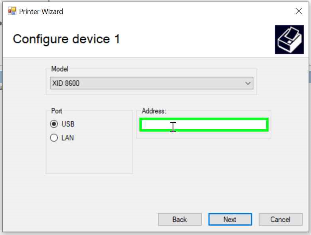
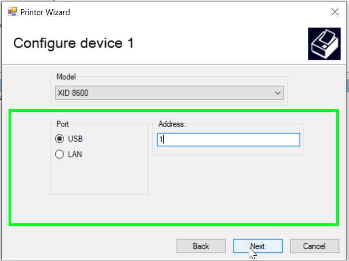
Select the USB connection type (LAN if using a networked printer) and the printer model from the drop-down list.

-
Enter the printer address.
For a USB printer, this is the unit number configured for the printer; you can set or display this through the printer's front panel. The unit number is used to reference the physical printer through the virtual production line printer configured using this process.
The address is the printer's IP address for a LAN printer.
Click Next.

-
If you are using a lamination unit, select the type of lamination unit from the model drop-down list, and select the lamination unit communication method; select Printer if the lamination unit is using infra-red to communicate with the printer.
Click Next.
- Provide a printer name, then click Next.
- Click Finish to complete the configuration.
-
Check the printer connection by connecting and powering up the printer (and the lamination unit if configured) and running the Job Monitor application that is installed with the software.
By default, the Job Monitor is installed in the following location:
C:\Program Files (x86)\Matica\EDIsecure\Apps\Job Monitor.exe
If the printer is shown as being offline, ensure that the printer is connected and that the printer address is correct. If, after the checks, the printer is still shown as being offline, restart the printer.

7.4.2 Catering for different card properties
You can configure the printing and lamination card profile for a production group through the administration center; see the documentation provided by the printer manufacturer for details.
A card profile caters for different card properties and whether printing is single or double sided. You must configure a production group for each printing use case to ensure that the output satisfies the use case; for example, to avoid card bending due to incorrect roller temperature. When using MyID, you must select the appropriate virtual printer.
7.4.3 Printer selection
Configuring a production group creates a virtual printer that is connected to the physical printer through its configured address. The physical printer device and any virtual printers are present in the available printer selection list when using a MyID workflow. The software provides management access only to the virtual printers and therefore you must select a virtual printer when using the printer for card personalization or when enhanced printer control is required.