3.2 Printing identity documents
Once you have requested a printed identity document for a person, and optionally had the request approved by another operator, you can print the document for them.
For more information on requesting a printed identity document, see section 3.1, Requesting printed identity documents.
Note: The operator printing the identity document must have access to the Print Identity Document workflow in the Edit Roles workflow.
To print an identity document:
-
Select the request you want to print.
In the MyID Operator Client:
-
Search for a request, and view its details.
See the Searching for a request section in the MyID Operator Client guide.
You can also view a request from any form that displays a link to the request.
For example:
- Click the entry in the list of requests in the Requests tab of the View Person form.
- Click the entry in the list of requests in the Device Requests tab of the View Device form.
- View the screen that appears automatically after you have requested a device, assuming that the request does not need to be approved by another operator first.
-
On the View Request screen, click Print Identity Document.
Note: Because the MyID Operator Client launches MyID Desktop to carry out the printing, you must have the MyID Client Service running and MyID Desktop installed on your PC. You are recommended to use the MSIX installation program.
Alternatively, if you are using MyID Desktop:
-
From the Cards category, select the Print Identity Document workflow.

-
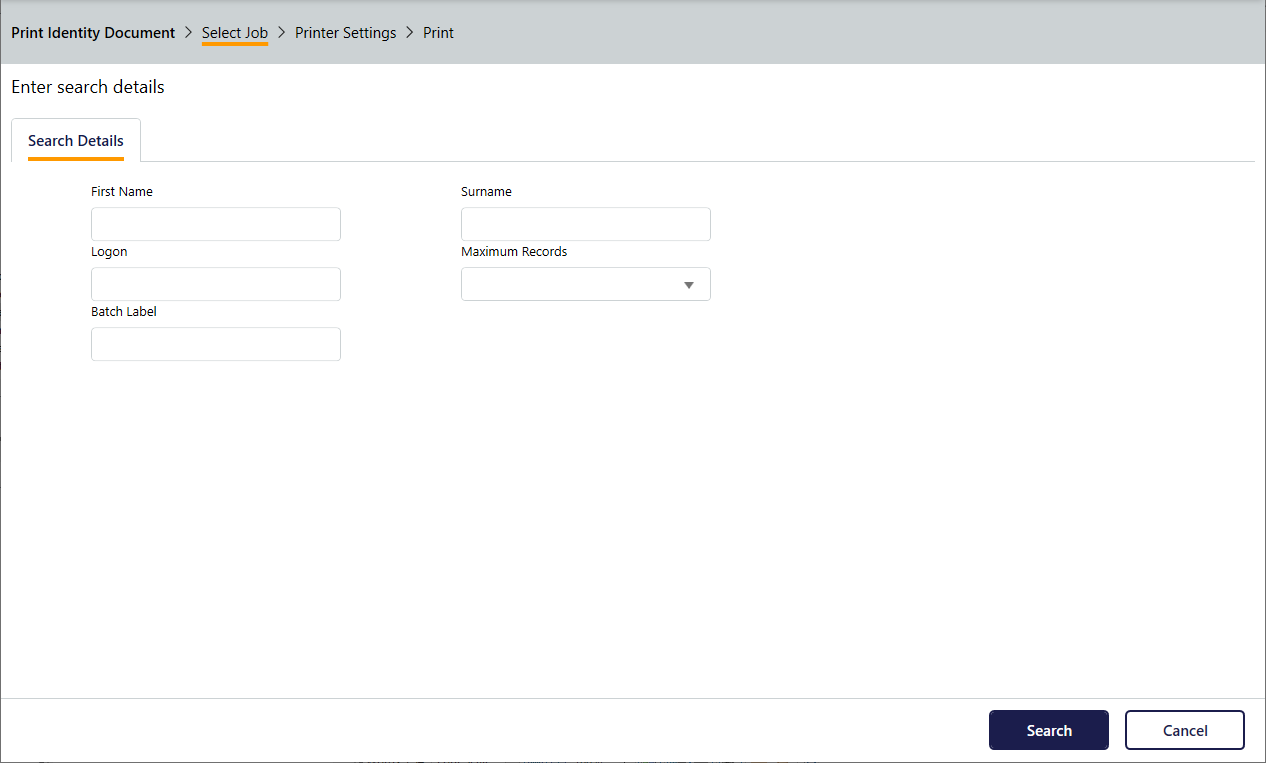
Search for the request.
You can use the following criteria:
-
First Name – type the first name of the recipient. You can use wildcards.
-
Surname – type the surname of the recipient. You can use wildcards.
-
Logon – type the logon name of the recipient. You can use wildcards.
-
Maximum Records – select the maximum number of records you want to return from the drop-down list.
-
Batch Label – type the label that was provided when requesting the printed identity document. You can use wildcards.
-
-
Click Search.
-
Select the request from the list.
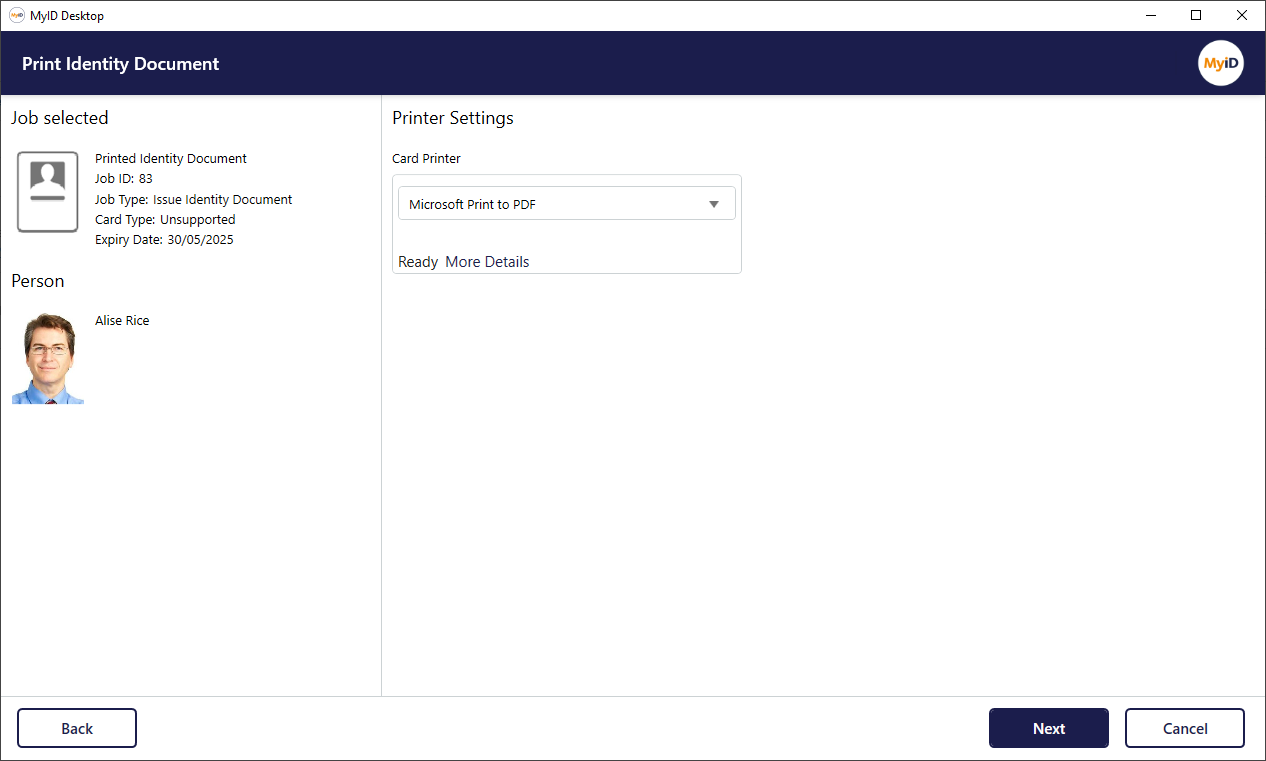
Once you have selected a request, the Print Identity Document screen appears.
-
-
Select a Card Printer from the drop-down list.
-
Click Next.
-
Select a Layout from the drop-down list.
Layouts appear in this list only if they are correctly configured for printed identity documents and are specified in the credential profile. For more information on setting up your card layouts, see section 2.1, Configuring card layouts for printed identity documents.
You can change the size of the preview using the sliders.
Note: Previews are available only if you have set the Image Upload Server configuration option (on the Video page of the Operation Settings workflow) to the address of your web server.
-
Click Print.