4.8 Requesting a device for a person
You can request a device for a person; for example, a smart card.
You can currently use the MyID Operator Client to request devices where the Card Encoding option in the credential profile is set to any of the following:
- Contact Chip
- Contactless Chip
- Microsoft Virtual Smart Card
- Software Certificates
- Windows Hello
-
FIDO Authenticator
Note: To request a mobile device for a person, that is, a device using a credential profile where the Card Encoding is Identity Agent, you must use the Request Mobile or Request Mobile (View Auth Code) options instead. See section 4.9, Requesting a mobile device for a person.
Depending on how your MyID system is set up, the person may be able to collect the device themselves (for example, using the Self-Service App), may require their request to be validated by an operator before collection, or may require the assistance of an operator to collect the device through MyID Desktop – MyID provides many issuance models to suit your organization's needs.
The issuance model depends on the configuration of the credential profile used to request the device. For more information, see the Managing credential profiles section in the Administration Guide.
4.8.1 Requesting a device
To request a device for a person:
-
Search for a person, and view their details.
See section 4.1, Searching for a person for details.
You can also view a person's details from any form that contains a link to their account.
For example:
- Click the link icon
 on the Full Name field of the View Request form.
 - Click the link icon on the Owner field of the View Device form.
You can request a device for a person directly from a directory; MyID automatically carries out the import of the person's details into the MyID database as if you had added the person from the directory manually (see section 4.2.2, Adding a person from a directory). Any issues that occur when attempting to import the person's details are displayed on screen when you click SAVE.
- Click the link icon
-
Click the Request Device option in the button bar at the bottom of the screen.
You may have to click the ... option to see any additional available actions.
-
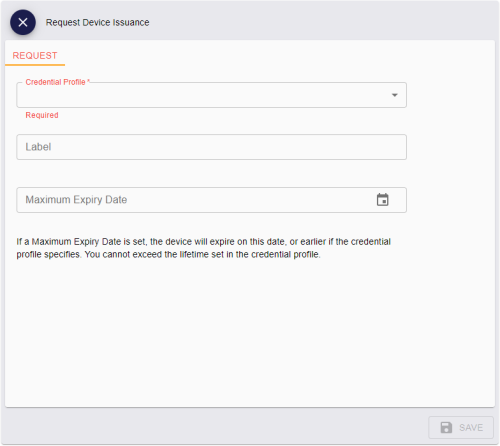
From the Credential Profile drop-down list, select the credential profile you want to use for the device.
The credential profiles available depend on the role of the operator and the role of the person for whom you are requesting the device; see the Linking credential profiles to roles section in the Administration Guide.
It is possible that there may be no credential profiles available for the person; this is most likely to occur when you are requesting a device for a person directly from the directory, and LDAP linked roles and default group roles are not set up; in this case, you are recommended to edit the person's details and manually assign a role that has access to one or more credential profiles.
-
Optionally, in the Label box, type a label for this request.
You can use the label to search for the request:
-
In the Requests search form, select Label from the additional search criteria.
-
In MyID Desktop, in the Job Management workflow, use the Batch Label box.
See the Searching for jobs section in the Administration Guide.
-
-
Optionally, set the Maximum Expiry Date.
This option is available only if the Set expiry date at request option (on the Issuance Processes page of the Operation Settings workflow) is set to Yes.
The maximum expiry date is the requested date on which the device will expire. You can select any date up to the Maximum credential expiry date specified for the person
The credential profile can override the Maximum credential expiry date set for the person if the Ignore User Expiry Date option on the credential profile is set.
Note: If the Expire cards at end of day configuration option (on the Issuance Processes page of the Operation Settings workflow) is set to Yes, the requested date will be 23:59 UTC on the date selected. See the Issuance Processes page (Operation Settings) section in the Administration Guide.
- Click SAVE to make the request.

Once you have created the request, the View Request screen appears. From this screen, you can cancel or collect the device request. See section 6, Working with requests.
Note, however, that if the credential profile requires validation, you cannot approve or reject the request from this screen; another operator must carry out the approval procedure.
4.8.2 Requesting devices for multiple people
If you want to request devices for multiple people, you can request the devices in a batch instead of requesting them one by one.
To request devices for multiple people:
-
Search the directory for the people for whom you want to request devices.
-
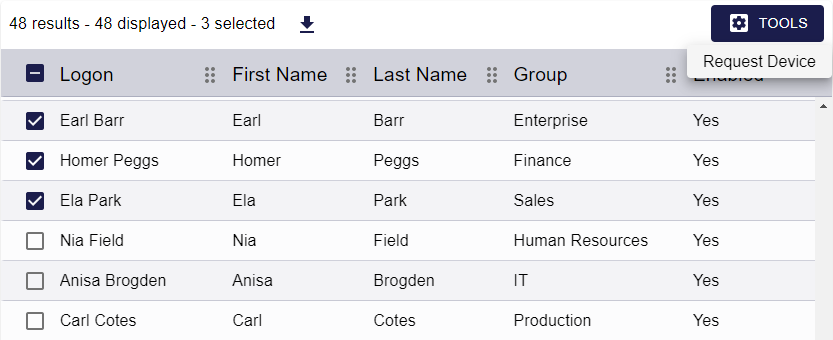
On the search results page, use the checkboxes to the left of the records to select one or more people.
Note: If you select one person, the process is the same as clicking the Request Device option in the button bar at the bottom of the View Person screen; MyID uses the batch process only if you select more than one person. See section 4.8.1, Requesting a device for details of requesting a single device.
-
From the Tools menu, select Request Device.
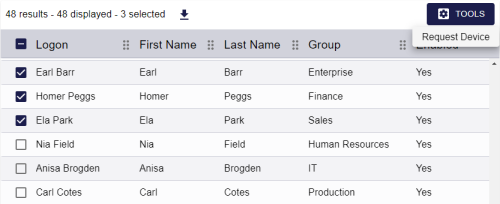
The Request Device Issuance screen appears.
Complete the details as for requesting a device for a single person, including the credential profile to be used for the requested devices; see section 4.8.1, Requesting a device.
Note: The list of credential profiles is constrained by the roles of the operator, not the potential recipients; this means that you can attempt to request devices using credential profiles that are not available to an individual recipient. If a credential profile is not available for a recipient, the request fails at the batch processing stage; however, the requests for other recipients who do have permission to receive the credential profile succeed.
-
Click Save.
The confirmation screen appears.
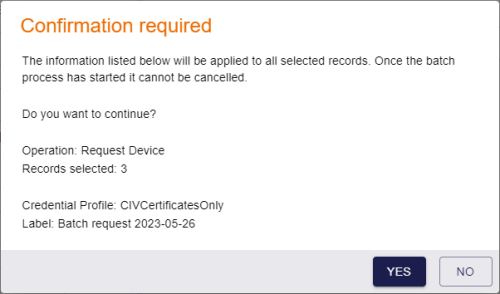
-
Click Yes to proceed with the request, or No to go back to the list of people.
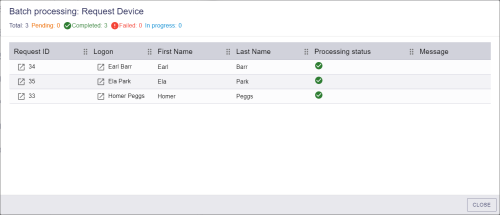
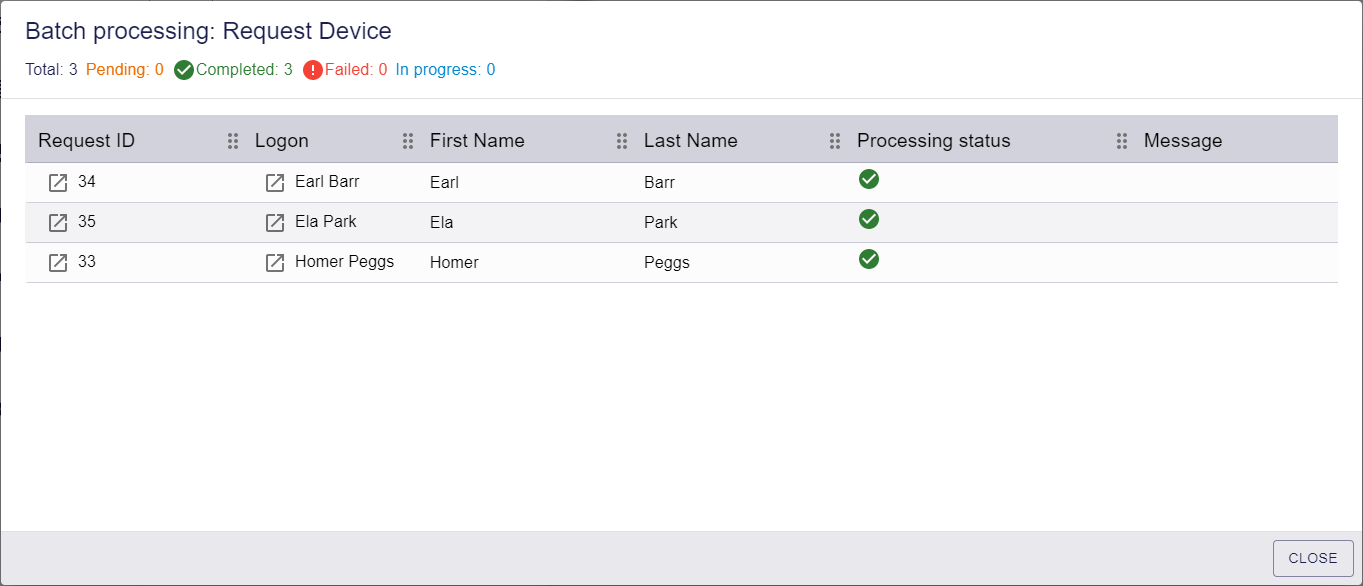
When you click Yes, the Batch Processing screen appears.
-
The requests are processed. The table shows the status of each request:

The request succeeded. 
The request failed. The Message column displays the reason for the failure; for example, the person may not have permissions for the credential profile selected. -
Click Close.

4.8.3 Known issues
-
IKB-367 – Problem adding a user from Active Directory where the logon name already exists in MyID
A problem has been identified when the following scenario occurs:
-
A user account is added to MyID from Active Directory.
-
The user account is removed from Active Directory, but no removal of the account from MyID takes place.
-
A new user account is created in Active Directory with the same logon name.
-
An attempt is made to request credentials for that user account in MyID.
When this occurs, errors similar to the following appear:
-
In the Request Card workflow in MyID Desktop:
There has been a problem validating the user due to missing or invalid data
-
In the Request Device screen in the MyID Operator Client:
Validation problem, the value for 'logonName', 'Logon', already existsError number: WS40001
As a workaround, you can remove the user account from MyID using Remove Person and repeat the steps to create the new request.
-